Friday, 30 September 2011

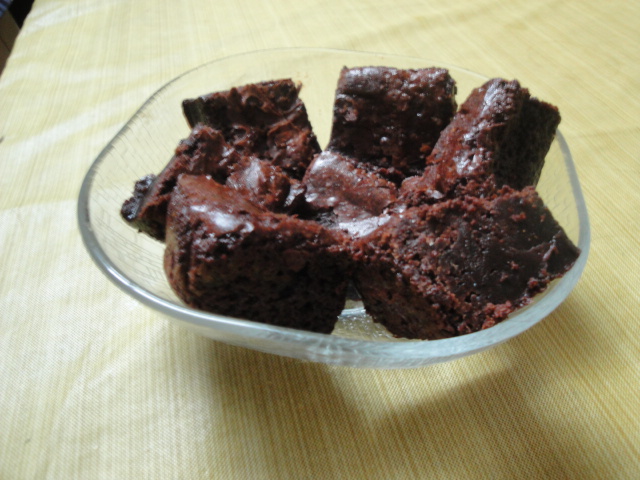
The World's Best Brownies


 With all the stress of SATs and College Apps, I needed something extremely chocolatey and sinful to drown my anxiety in. Something easy to make, but still delicious. I came across this recipe and was so happy with the results. Seriously, I don't think anyone could not like these brownies. I know everyone has their ''best brownie'' recipe, and I did too, until I tried this one. Now, this is my go-to brownie recipe. I've made these at least 4 times in the past two weeks. I first made these brownies for the excursion my class went on, to Ooty and Masanagudi, and they were a big hit. I promise you won't be disappointed. I'm writing my SAT tomorrow, and I'm super nervous. So obviously, I baked to ease the nerves. And what did I bake? These brownies! And how many did I eat? Let's not even go there. :P These brownies are to die for!! Rich, decadent, chocolatey goodness...That's what these brownies are. I'm kind of on this brownie craze right now, so I apologize for the number of brownie recipes I've been posting. I'll post something new next time :D But until then, enjoy these sinfully rich brownies. :) This recipe, from the King Arthur Flour website, makes about 24 brownies.


Ingredients:


1 cup unsalted butter
2  1/4 cup sugar
4 large eggs
1  1/4 cup dutch-processed cocoa powder
1 teaspoon salt
1 teaspoon baking powder
1 teaspoon espresso powder
1 tablespoon vanilla extract
1  1/2 cups all-purpose flour
2 cups chocolate chips (optional, but I highly recommend adding them!)


Method:


1. Preheat the oven to 350 degrees farenheit (about 180 degrees celcius). Line or grease a 9x13 inch pan.
2. In a microwave-safe bowl, or in a saucepan, melt the butter over low heat, and then add the sugar to it, stirring to combine. Alternatively, combine the butter and sugar and stir on low heat until butter is melted. If you want a shiny crackly crust, reheat the butter and sugar mixture until the mixture is hot, but not bubbling. This dissolves the sugar even more and yields a shiny crust.


3. In a separate bowl, stir together the eggs, cocoa powder, salt, baking powder, espresso powder and vanilla extract.
4. Add the butter-sugar mixture, stirring continuously.


5. Stir in the flour until smooth, and then stir in the chocolate chips. If you do not want the chocolate chips to melt while baking, let the batter cool for 15-20 minutes before stirring them in. 
6. Pour the batter into the prepared pan.


7. Bake for 30-35 minutes, until a toothpick comes out with a few moist crumbs. Cool before cutting. 


Sunday, 11 September 2011

Cocoa Brownies

     The cakey brownies vs fudgey brownies battle is ongoing. I don't think it will ever end. As long as people have different tastes, opinions and preferences, the ''Brownie War'' will always exist. Personally, I prefer fudgey brownies. If I wanted cakey brownies, I would just eat cake. One can argue and say ''But if you want fudgey brownies, why not just eat fudge?'', which is true, but I think the most notable feature of a brownie is its deep, rich, fudgey-ness. My favorite brownies are those with the thin, shiny, crackly crust. These brownies don't have that crust I love so much, but the taste makes up for that. I'm actually not quite sure whether to call these brownies or fudge. The batter is so thick, it's almost like cookie dough. The 'brownie dough' itself is sure to be an indication of how fudgey these brownies are! This recipe has been circulating the internet, jumping from blog to blog, for quite some time now, so I figured it must be worth trying out. Yes, these brownies are made from cocoa, not chocolate, but I assure you, it does not compromise on taste at all! These brownies aren't my favorite, but they are super easy to whip up, and taste pretty darn good! I'm sorry I don't have any photos of the brownies. They were devoured before I could take pictures of them!!

Ingredients:

10 tablespoons unsalted butter
1  1/4 cup sugar
3/4 cup + 2 tablespoons cocoa powder
1/4 teaspoon salt
1/2 teaspoon vanilla extract
2 large eggs, cold
1/2 cup all purpose flour


Method:

1. Preheat the oven to 325 degrees Farenheit (160 degrees Celcius). Grease an 8x8 inch baking pan, or line with foil or parchment paper.
2. Combine butter, sugar, cocoa and salt in a heatproof bowl and melt over a pan of simmering water. Alternatively, microwave butter sugar cocoa and salt until butter is melted and mixture is smooth and warm.
3. Stir in the vanilla essence.
4. Add eggs one at a time, mixing thoroughly after the addition of each egg.
5. Mix in flour into the batter/brownie dough.


6. Pour batter/brownie dough into the pan.


7. Bake for about 30 minutes, until a toothpick inserted in the center of the pan comes out moist with a few crumbs.
8. Cool completely before cutting.


Wednesday, 7 September 2011

Lemon Cupcakes

    I know summer is ending in the Western hemisphere, but here in India, it's pretty much summer year round, especially down south in Chennai, where I live. It rains for a month a year....The rest of the year, it's just hot. Summer reminds me of the pool, the beach, lazing around in air conditioned places (especially the mall!), ice cream (lots of it!), watermelon, and lemonade. I love a perfect glass of cold, refreshing, lip-smacking lemonade. I'm not a big lemon fan, but lemonade is one of my all time favorites. So I started thinking....What if I could make lemonade a dessert? You probably think I'm crazy, but actually, it's not all that bad an idea! So I went in search of the perfect lemon cupcake recipe. After all, when life gives you lemons, you make lemon cupcakes! It seemed to me like My Baking Obsession had read my mind, because she posted a recipe for lemon meringue cupcakes that very day! This was the first lemon cupcake recipe I've ever tried, and it might just be the last, because I think I've hit the jackpot! I initially made these for a friend for her birthday two weeks ago, and I've made these about 4 times since! The cupcakes have a light lemony flavor to them. The lemon curd gives you that jolt of tangy lemon taste, and the sweet vanilla buttercream frosting perfectly balances all the flavors. I've never made lemon curd before I found this recipe, so I was a bit apprehensive about the lemon curd part of the cupcake, but then I saw how easy it was! This easy microwave lemon curd recipe is one I'll be sure to keep in my back pocket! This is an easy, amazingly yummy lemon cupcake recipe that's perfect for a lazy summer day. Actually, it's perfect for any day! So even though summer is ending, and everyone's got their apples and pumpkin and maple out, I suggest you try out these cupcakes, as you bid farewell to summer.  This recipe is adapted from My Baking Obsession.


Ingredients:


2 1/4 cups cake flour 
1 tablespoon baking powder
1/2 teaspoon kosher salt
1 1/4 cups buttermilk, room temperature
4 large egg whites, room temperature
1 1/2 cups sugar
lemon zest from two lemons (finely grated)
1 stick (8 tablespoons) unsalted butter, at room temperature
1 teaspoon pure vanilla extract


Method:


1. Preheat oven to 350 degrees F. Line cupcake tins with cupcake liners. 
2. In a bowl, sift together the flour, baking powder and salt.
3. Whisk together the buttermilk and egg whites in another bowl.
4. Place the sugar and lemon zest in the bowl of your mixer or another large bowl and rub them together with your fingers until the sugar is moist and fragrant. 

5. Add the butter and beat at medium speed, until the butter and sugar are light and fluffy. 


6. Beat in the vanilla, then add one third of the flour mixture, still beating on medium speed. 
7. Beat in half of the milk-egg mixture, then beat in half of the remaining dry ingredients until incorporated. 
8. Add the rest of the milk and eggs, beating until the batter is thoroughly combined. Add the last of the dry ingredients. 
9. Beat the mixture for an additional two minutes or so, to ensure that it is thoroughly mixed and well aerated.


5. Distribute the batter between the cupcake wells.
6. Bake for 18-22 minutes, or until the cupcakes are springy to the touch and a toothpick inserted into the centers come out clean. Cool.

7. Once completely cooled, spoon a layer of lemon curd onto each cupcake, and let it set for about an hour in the fridge. Alternatively, you could make a small hollow in the center of each cupcake and spoon or pipe in a dollop of lemon curd. I decided to go with the first method.


8. Frost with vanilla buttercream frosting. 


LEMON CURD:
(makes about 2 cups)


Ingredients:


1 cup white sugar
3 eggs
1 cup fresh lemon juice 
zest of 3 lemons
1/2 cup unsalted butter, melted


Method:


1. In a large microwave-safe bowl, whisk together the sugar and eggs until smooth and thoroughly combined.
2. Whisk in the lemon juice, lemon zest and butter. 
3. Cook the mixture in the microwave on full power for one minute intervals, stirring after each minute. This will take about 3-5 minutes, depending on the strength of your microwave. The lemon curd is done when it coats the back of a metal spoon.
4. Pour into a sterile, air-tight jar.


FROSTING:


I used my favorite vanilla buttercream frosting. You can find the recipe at the end of this mocha cake recipe.


Chocolate Cupcakes

    Chocolate is one of those universally loved foods. I don't think it's possible to not like chocolate. I mean, c'mon...It's chocolate! Being a self-professed chocoholic, I'm not very choosy when it comes to chocolate. Whether its a chocolate bar, or a brownie, cupcake or cookie, I'll eat it all! Chocolate cupcakes are just amazing. Who would have ever thought that so much chocolatey flavor could be packed into one small cupcake? Top it off with a generous dollop of chocolate buttercream frosting, and I'm in chocolate paradise. These chocolate cupcakes are simple and comforting, and absolutely delicious. You'll never want to try another chocolate cupcake recipe once you've tried this. Of course that isn't going to stop me from trying out new recipes and comparing them, but this is probably as good as it gets!


My birthday was a few weeks ago, and a family friend of ours bought me my first Bundt cake pan (YAY!!) along with some really cute cupcake liners. I love cupcake liners. Using cute cupcake liners makes eating cupcakes an even more enjoyable experience. I think it adds a whole new dimension to enjoying these delicious treats. Cupcakes without cupcake liners seem kind of naked, don't you think?


This recipe is adapted from My Baking Obsession. Be sure to check out this blog. It's amazing!
Ingredients:


1 3/4 cups all-purpose flour
2 cups sugar
3/4 cups good cocoa powder
2 teaspoons baking soda
1 teaspoon baking powder
1 teaspoon kosher salt
1 cup buttermilk, shaken
1/2 cup vegetable oil
2 large eggs, at room temperature
2 teaspoons pure vanilla extract
1 cup freshly brewed hot coffee
Method:

1. Preheat the oven to 350 degrees farenheit (about 175 degrees celcius). Line the cupcake pan with paper liners.
2. Sift the flour, sugar, cocoa, baking soda, baking powder, and salt into the bowl.


3. In another bowl, combine the buttermilk, oil, eggs, and vanilla.
4. With the mixer on low speed, slowly add the wet ingredients to the dry. 
5. With mixer still on low, add the coffee and stir just to combine, scraping the bottom of the bowl with a rubber spatula.
6. Pour the batter into the cupcake pan, filling each well about 2/3 full. 
7. Bake for 18 to 22 minutes, or until a cake tester comes out clean. 
8 Cool in the pans for 10 minutes, then remove to a cooling rack and cool completely.

**For the chocolate buttercream frosting recipe, click here.


Wednesday, 31 August 2011

Butter Cookies

     As I said in my previous post, I'm not a big fan of cookies unless they have chocolate in them. So naturally, when I decide to bake cookies, butter cookies are not on the top of the list. In fact, they probably aren't on the list at all! But I decided to try out this butter cookie recipe that had some pretty great reviews. And needless to say, I wasn't disappointed. These cookies were pretty darn good! They are buttery and crumbly, but not to sweet, which is perfect, because then, you can eat more! This is a simple classic butter cookie recipe, but butter cookies are pretty versatile, so you can change it up to your liking. Just think...Cinnamon and Sugar, chocolate and raspberry, coconut, jam, lemon curd, or frosted...You can eat these however you like! Needless to say, I dipped mine in chocolate. I ate the chocolate covered ones before I could take photos of them though! This recipe yields about 12 cookies.


Ingredients:


ounces unsalted butter

1/4 cup granulated sugar

1/16 teaspoon salt

1/2 teaspoon pure vanilla extract

1/4 large egg yolk

1/2 cup all purpose flour


Method:

1. Preheat the oven to 325 degrees farenheit (about 160 degrees celcius).
2. Beat the butter, sugar, salt and vanilla together until smooth and creamy.
3. Mix in the egg yolk until well incorporated, scraping down the sides of the bowl at least once.
4. Add the flour and mix just until incorporated. The dough will be a little sticky at this point, so knead it a few times until it smoothens out.
5. Form balls of about 1/8 inch thickness, and flatten them slightly. These cookies don't spread much, but they do need some room around each cookie.
6. Bake for about 16 to 18 minutes, until the cookies start to turn golden around the edges.


Sunday, 28 August 2011

Sugar Cookies

   I know this may sound weird, but I don't like sugar cookies. In fact, I don't like any cookie unless it has chocolate in it. Give me a simple classic chocolate chip cookie and I'll be happy. A few days ago, I decided to bake sugar cookies for a friend who absolutely adores cookies in any form. Obviously I tried one of the sugar cookies I made, and truth be told, these cookies were actually pretty good! The sugar crystals on top added a cute touch to them as well! I can't say I'm in love with sugar cookies now, but I don't hate them anymore either! I'm sure all you sugar cookie fans out there will enjoy this recipe. This recipe is adapted from the allrecipes website.


Ingredients:


1/4 cup and 2 tablespoons butter, softened


  • 1/2 cup white sugar
  • 1 eggs
  • 1/4 teaspoon vanilla extract
  • 1-1/4 cups all-purpose flour
  • 1/2 teaspoon baking powder
  • 1/4 teaspoon salt


Method:

  1. In a large bowl, cream together butter and sugar until smooth. 
  2. Beat in eggs and vanilla. 
  3. Stir in the flour, baking powder, and salt. 
  4. Cover, and chill dough for at least one hour (or overnight).
  5. Preheat oven to 400 degrees F (200 degrees C). 
  6. Roll out dough on floured surface 1/4 to 1/2 inch thick. Cut into shapes with any cookie cutter. Place cookies 1 inch apart on ungreased cookie sheets.
  7. Bake 6 to 8 minutes in preheated oven. Cool completely.


Friday, 19 August 2011

Fudge Brownies

    Today was my 17th birthday. It was one of the best birthdays ever! School was fun (shocking, I know!), and then some family friends came over for dinner. There's going to be a party at home tomorrow. But today was a happy, fun day. One of my family friends baked me a delicious chocolate cake. Dinner was a lot of fun. It consisted more of laughter and sharing old memories and funny stories rather than actually eating. Now I'm looking forward to the party tomorrow!
     A lot of people asked me if I was going to bake my birthday cake. I said no. I bake for everyone else's birthdays. Why should I bake for my own? But you know me, I can't pass up an opportunity to bake! So, I baked myself birthday brownies! I came across this recipe from Diving Baking and I knew at once, that this was the recipe I was going to try out. I love fudgy brownies with a crackly crust. This recipe makes the perfect dense fudgy brownies. And the crust....Oh, I could go on forever about how wonderful the crust is! What I'm trying to say is, this recipe is a must try! You won't be disappointed, I promise!!


Ingredients:


3/4 cup butter
1 pound (16 ounces) bittersweet chocolate, coarsely chopped
3/4 cup + 2 tablespoons all-purpose flour
4 large eggs
2 cups brown sugar*
1/2 teaspoon salt
1 teaspoon vanilla 

*It's hard to get brown sugar here in India, so I use one tablespoon of honey and one cup of white sugar for every cup of brown sugar required, and it comes out perfectly!

Method:


1. Preheat the oven to 350F. Grease a 9-by-13-inch glass baking dish, or line with parchment paper or foil.
2. In a small saucepan, melt the butter over low heat. 
3. Remove from the heat and add the chocolate. Set aside to cool. 


4. Sift the flour into a small mixing bowl. 
5. In a medium mixing bowl, combine the eggs, sugar, salt, and vanilla. Using a mixer fitted with the whisk attachment, beat on high speed until the mixture thickens and becomes pale in color, about 4 to 5 minutes. 
6. Using a rubber spatula, fold the cooled chocolate into the egg mixture. 
7. Add the flour and fold it in quickly but gently with the rubber spatula so that you don’t deflate the air that’s been incorporated into the eggs.


8. Pour the batter into the prepared dish. 
9. Bake until the top looks slightly cracked and feels soft to the touch, about 25 minutes. Let cool completely on a wire rack.